What is VPN?
VPN means “Virtual Private Network” and it opens the opportunity to establish the network connection over a protected network while users are using public networks. VPNs encrypt the network traffic and conceal user’s online identities. This makes it very difficult for third parties to track the user’s activities online and steal data. The encryption process takes place in real-time.
A VPN hides the user’s IP address by letting the network redirect it through a specially configured remote server run by a VPN server/host. This means that if the user surf online with a VPN, the VPN server becomes the source of your data. Thus users ISP)and other third parties cannot see which websites you visit or what data you send and receive online. A VPN works like a filter that turns all your data into “gibberish”. Even if someone were to get their hands on your data, it would be useless.
What is BDIX VPN?
While your VPN server is hosted within the BDIX network then that VPN server will be known as the BDIX VPN.
For example, if you are installing the VPN server on the VPS or Dedicated Server that is hosted on XeonBD’s Bangladesh data center that VPN server will be a BDIX VPN server. And from that VPN server, you can take the full benefits of the BDIX, to learn more about the advantages of BDIX by clicking here. You can find the full list of offered BDIX services of XeonBD by clicking here.
What Is OpenVPN?
The OpenVPN project was founded in 2001.
The OpenVPN protocol is known as the de-facto standard in the open source networking space. It supports all the major operating systems, including the desktop and mobile platforms of Windows, macOS, Linux, Android, and iOS. It also supports less common platforms such as FreeBSD, QNX, Solaris, Maemo, Windows Mobile, and ChromeOS.
The OpenVPN protocol provides excellent security and is highly adaptable for third-party software. It includes 256-bit encryption (though the number of bits can be configured at any time) via OpenSSL, a widely used software library to secure connections across different networks.
OpenVPN can utilize two different protocols when transmitting data: TCP and UDP. The Transmission Control Protocol (TCP) is more commonly used. It is designed for high reliability, as it includes error correction, and is known as a ‘stateful’ protocol. OpenVPN can also employ UDP, or User Datagram Protocol. UDP increases the speed of communication between the computer and the server.
How to Setup OpenVPN Server on Ubuntu 20?
Step #1 – SSH to the server as a root user
SSH to the server as a root user.
In this case, you can use putty or terminal. You can download the putty software from https://www.chiark.greenend.org.uk/~sgtatham/putty/latest.html

Once PuTTY package is downloaded start the installation process.
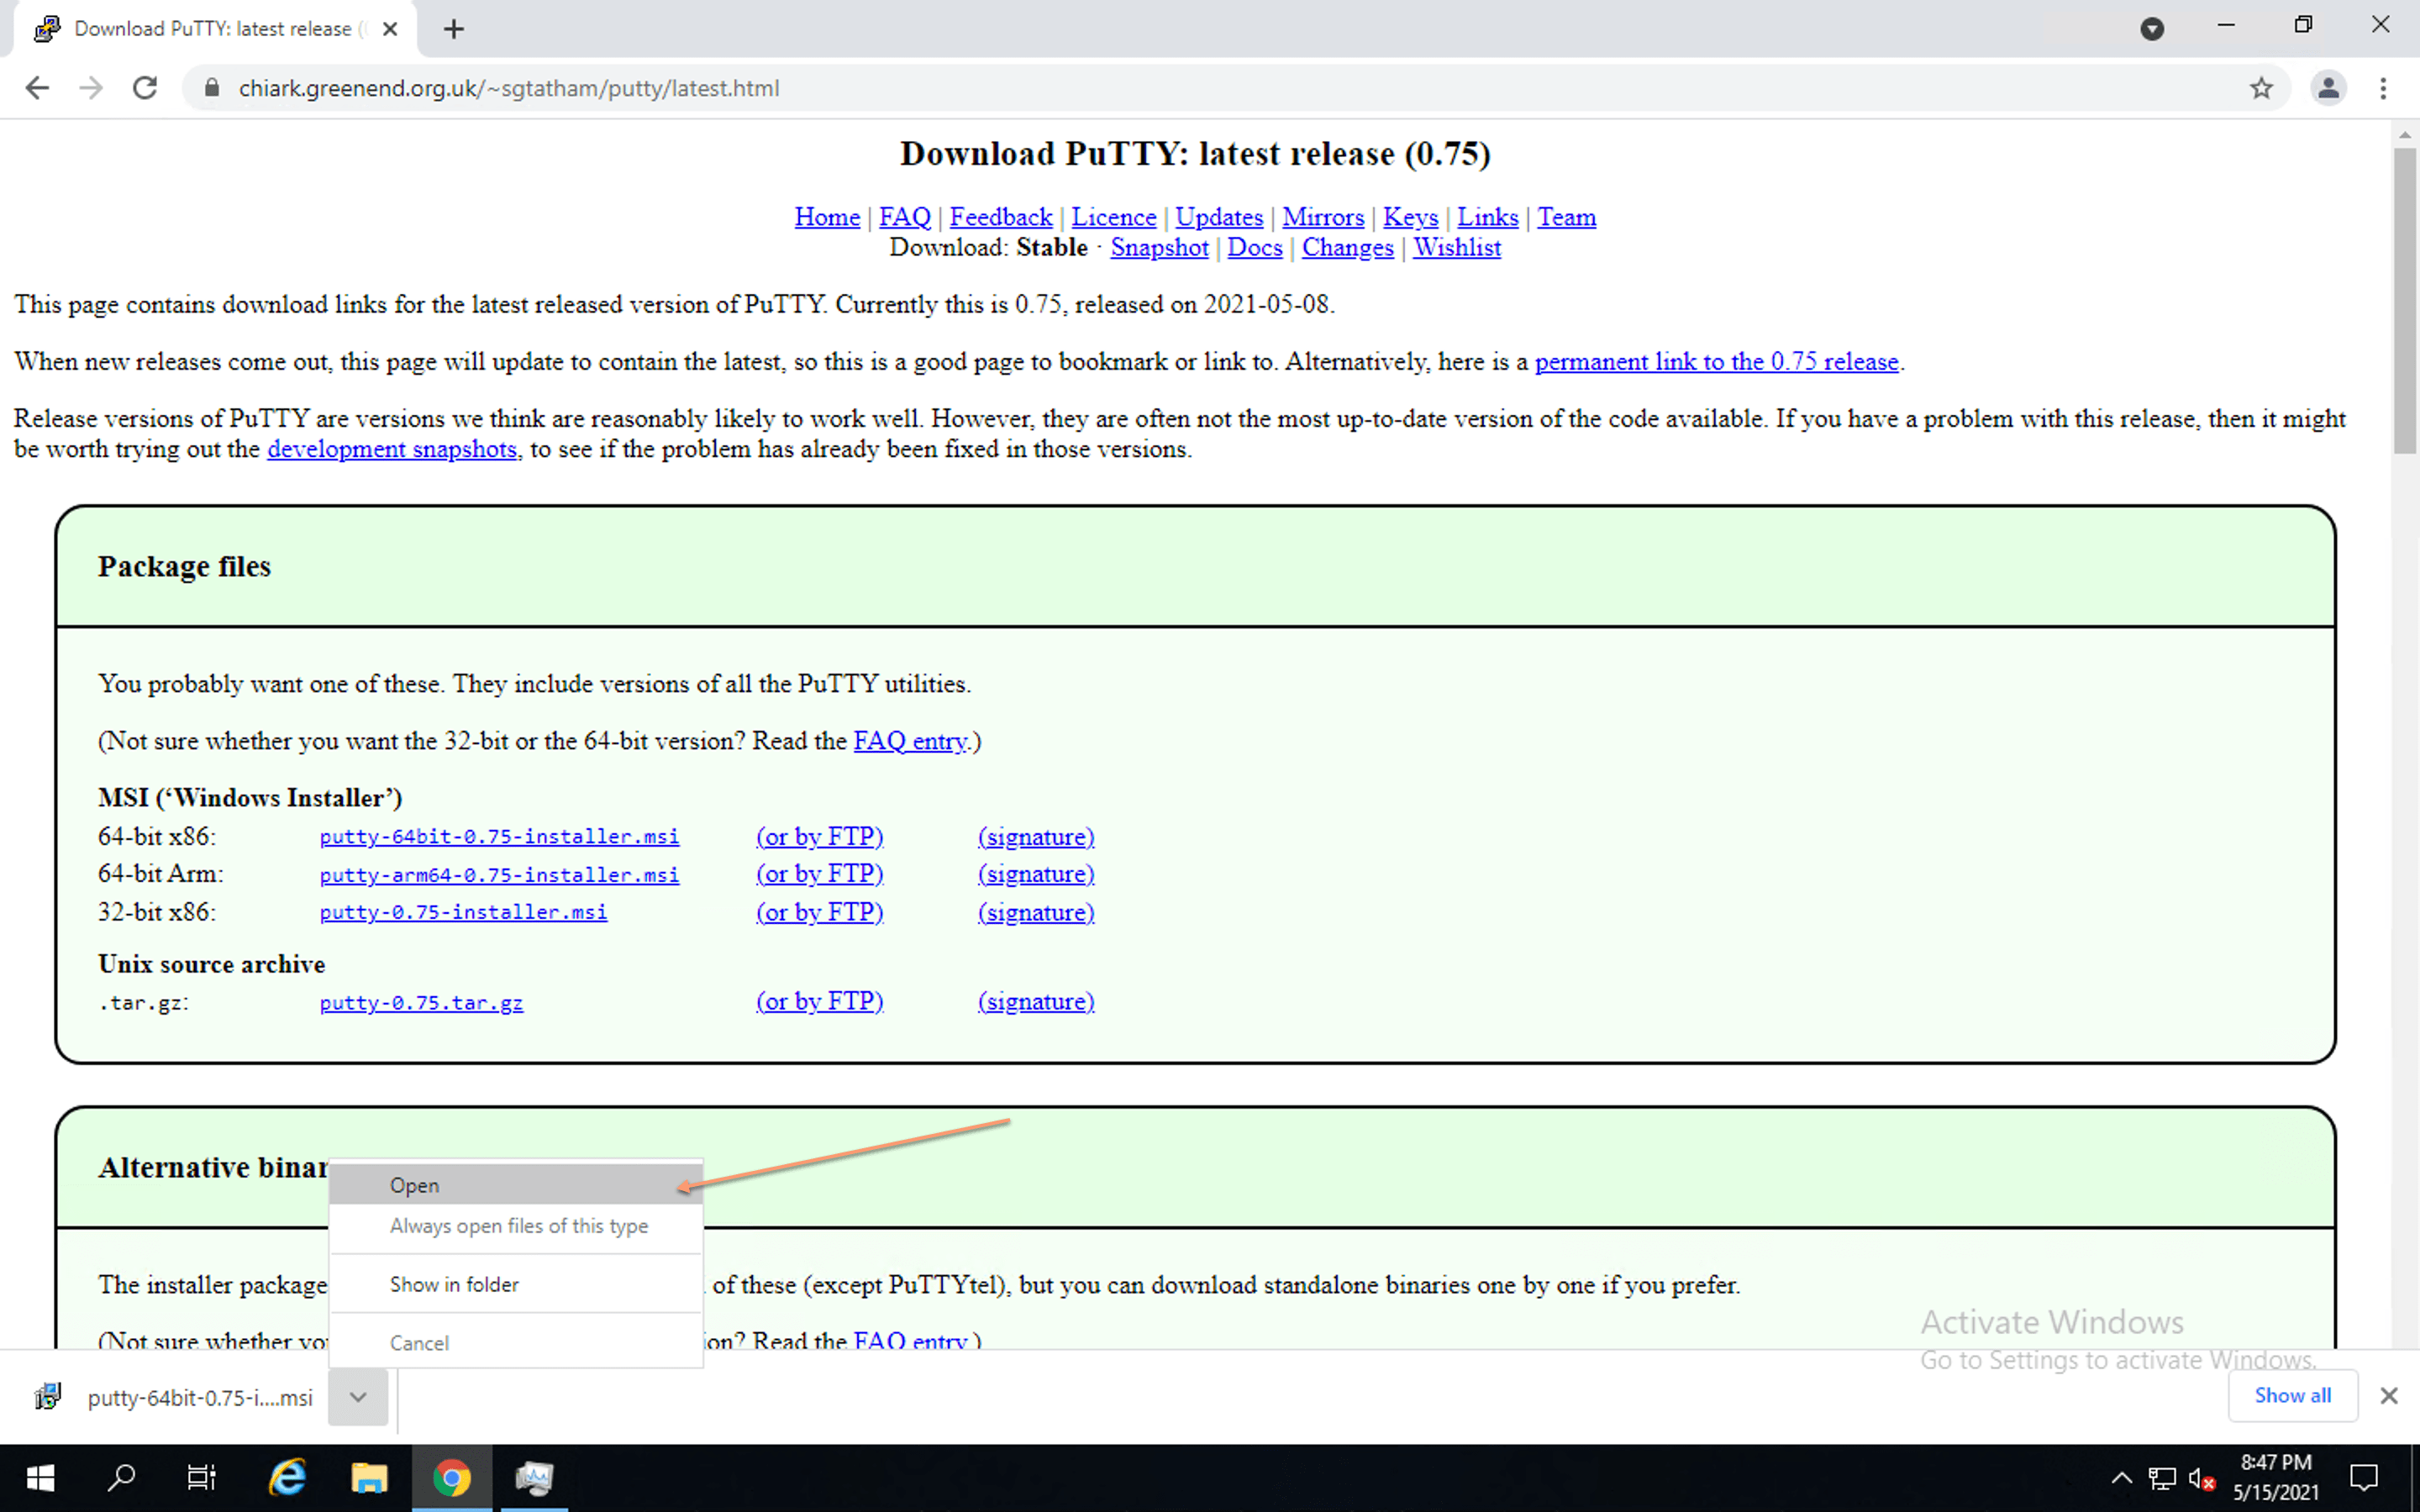
Click on the Next button and proceed to the next step.

At the second step of the PuTTY installation process click on the Next button
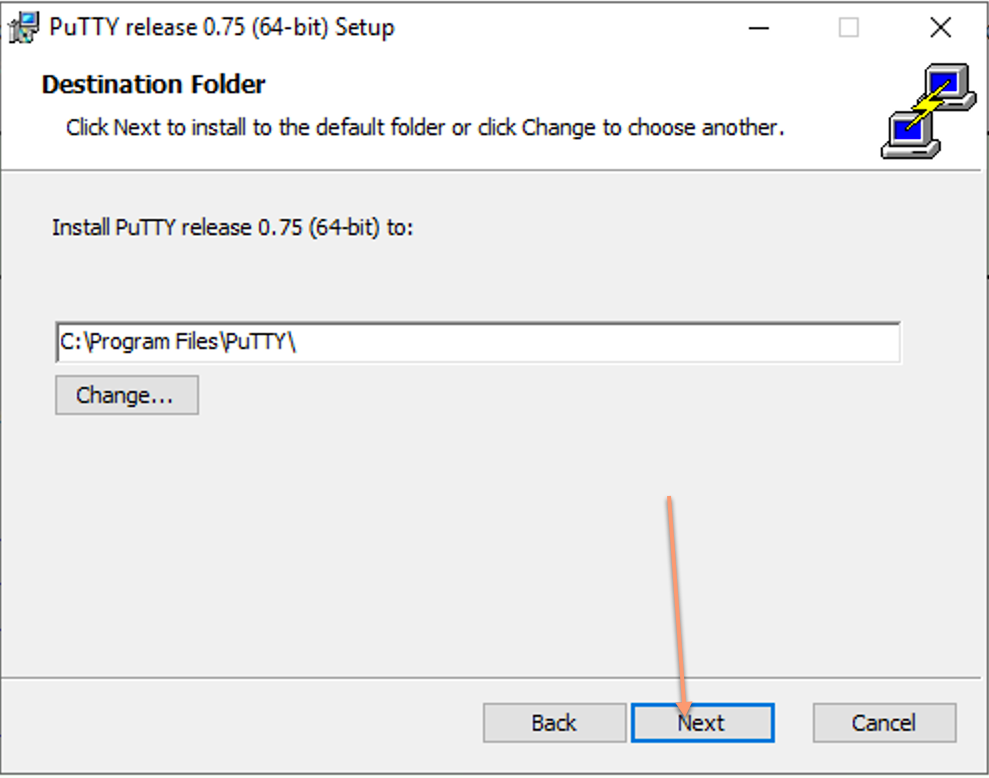
At the third step click on the Install button to start the installation process

And at last on the last screen click on the Finish button as your PuTTY installation process has now completed successfully.

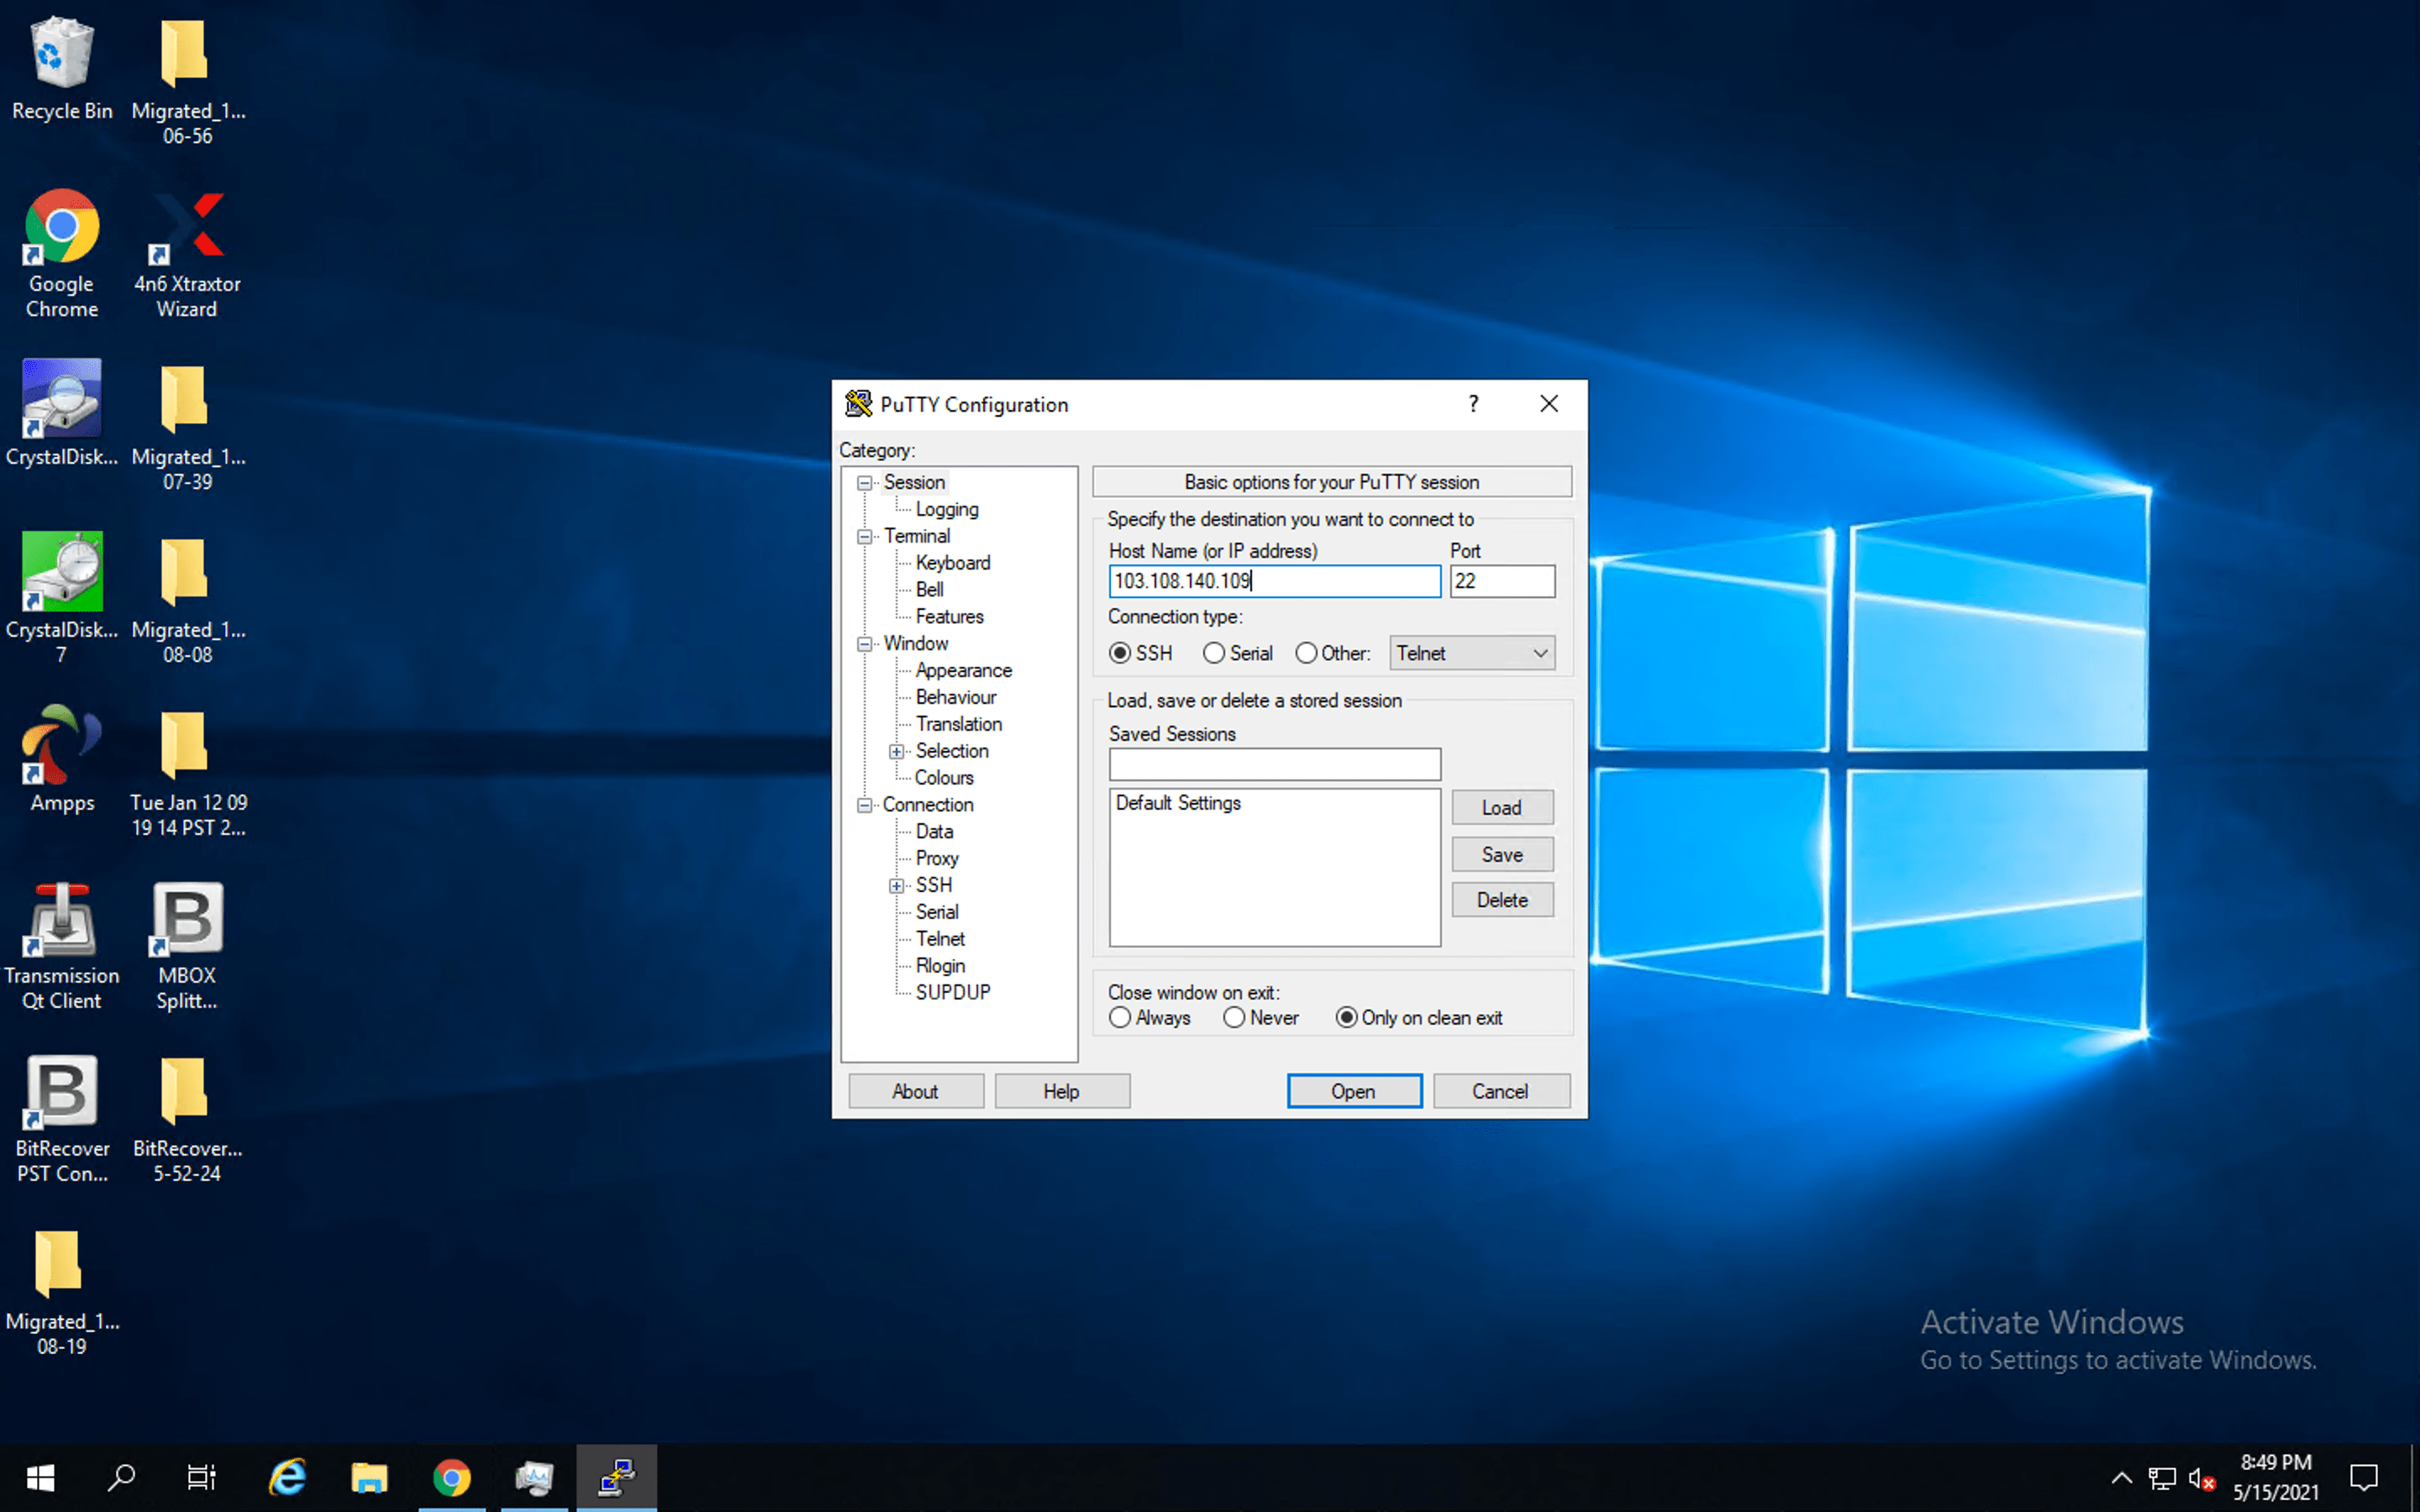
Now Open the putty to connect to the server using the SSH protocol as shown on the below screenshot.

Write down the IP address of the server on the Host Name (or IP address) field and click on the open when you are done.
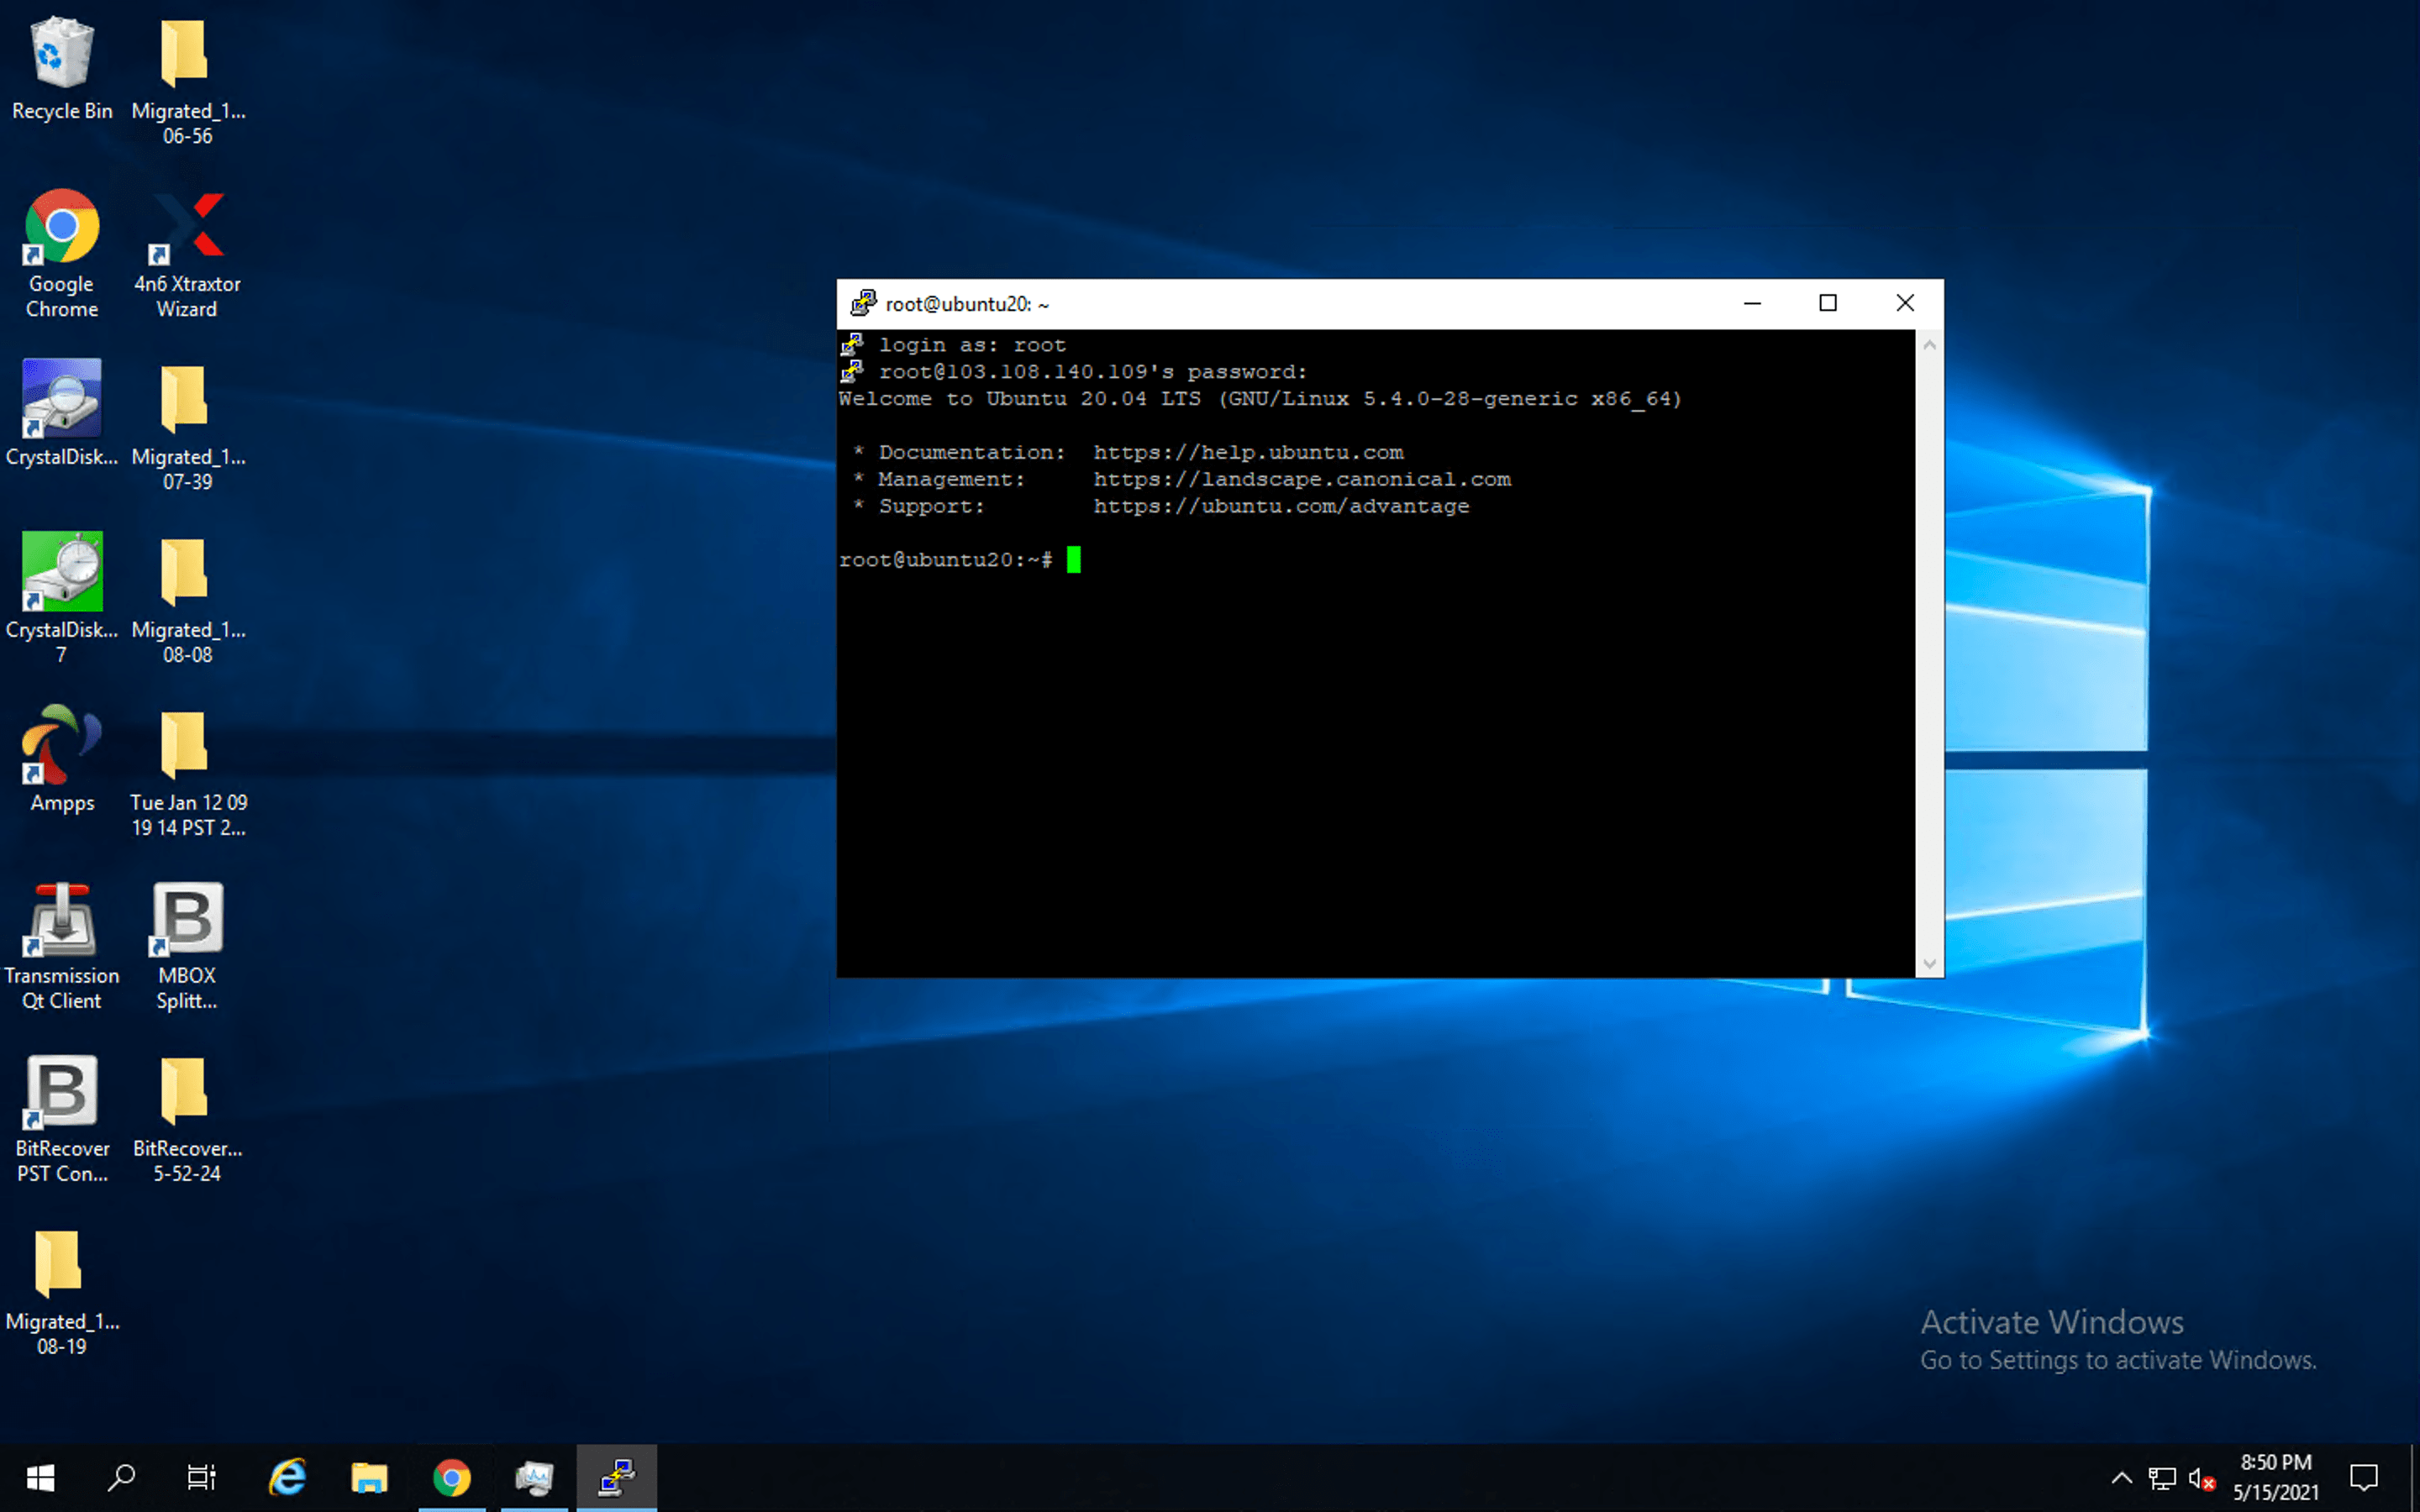
Provide the server’s login information (user name and password) and press enter.
Step #2 – Update your system
Update the server by running the following two commands.
$ sudo apt update
$ sudo apt upgrade
Step #3 – Find and note down the server’s IP address

Step 3 – Download and run openvpn-install.sh script
We are going to use the wget command to download a script from https://git.io/vpn
$ wget https://git.io/vpn -O openvpn-install.sh
Setup permissions using the chmod command:
$ chmod +x openvpn-install.sh
Run openvpn-install.sh to install OpenVPN server
$ sudo ./openvpn-install.sh
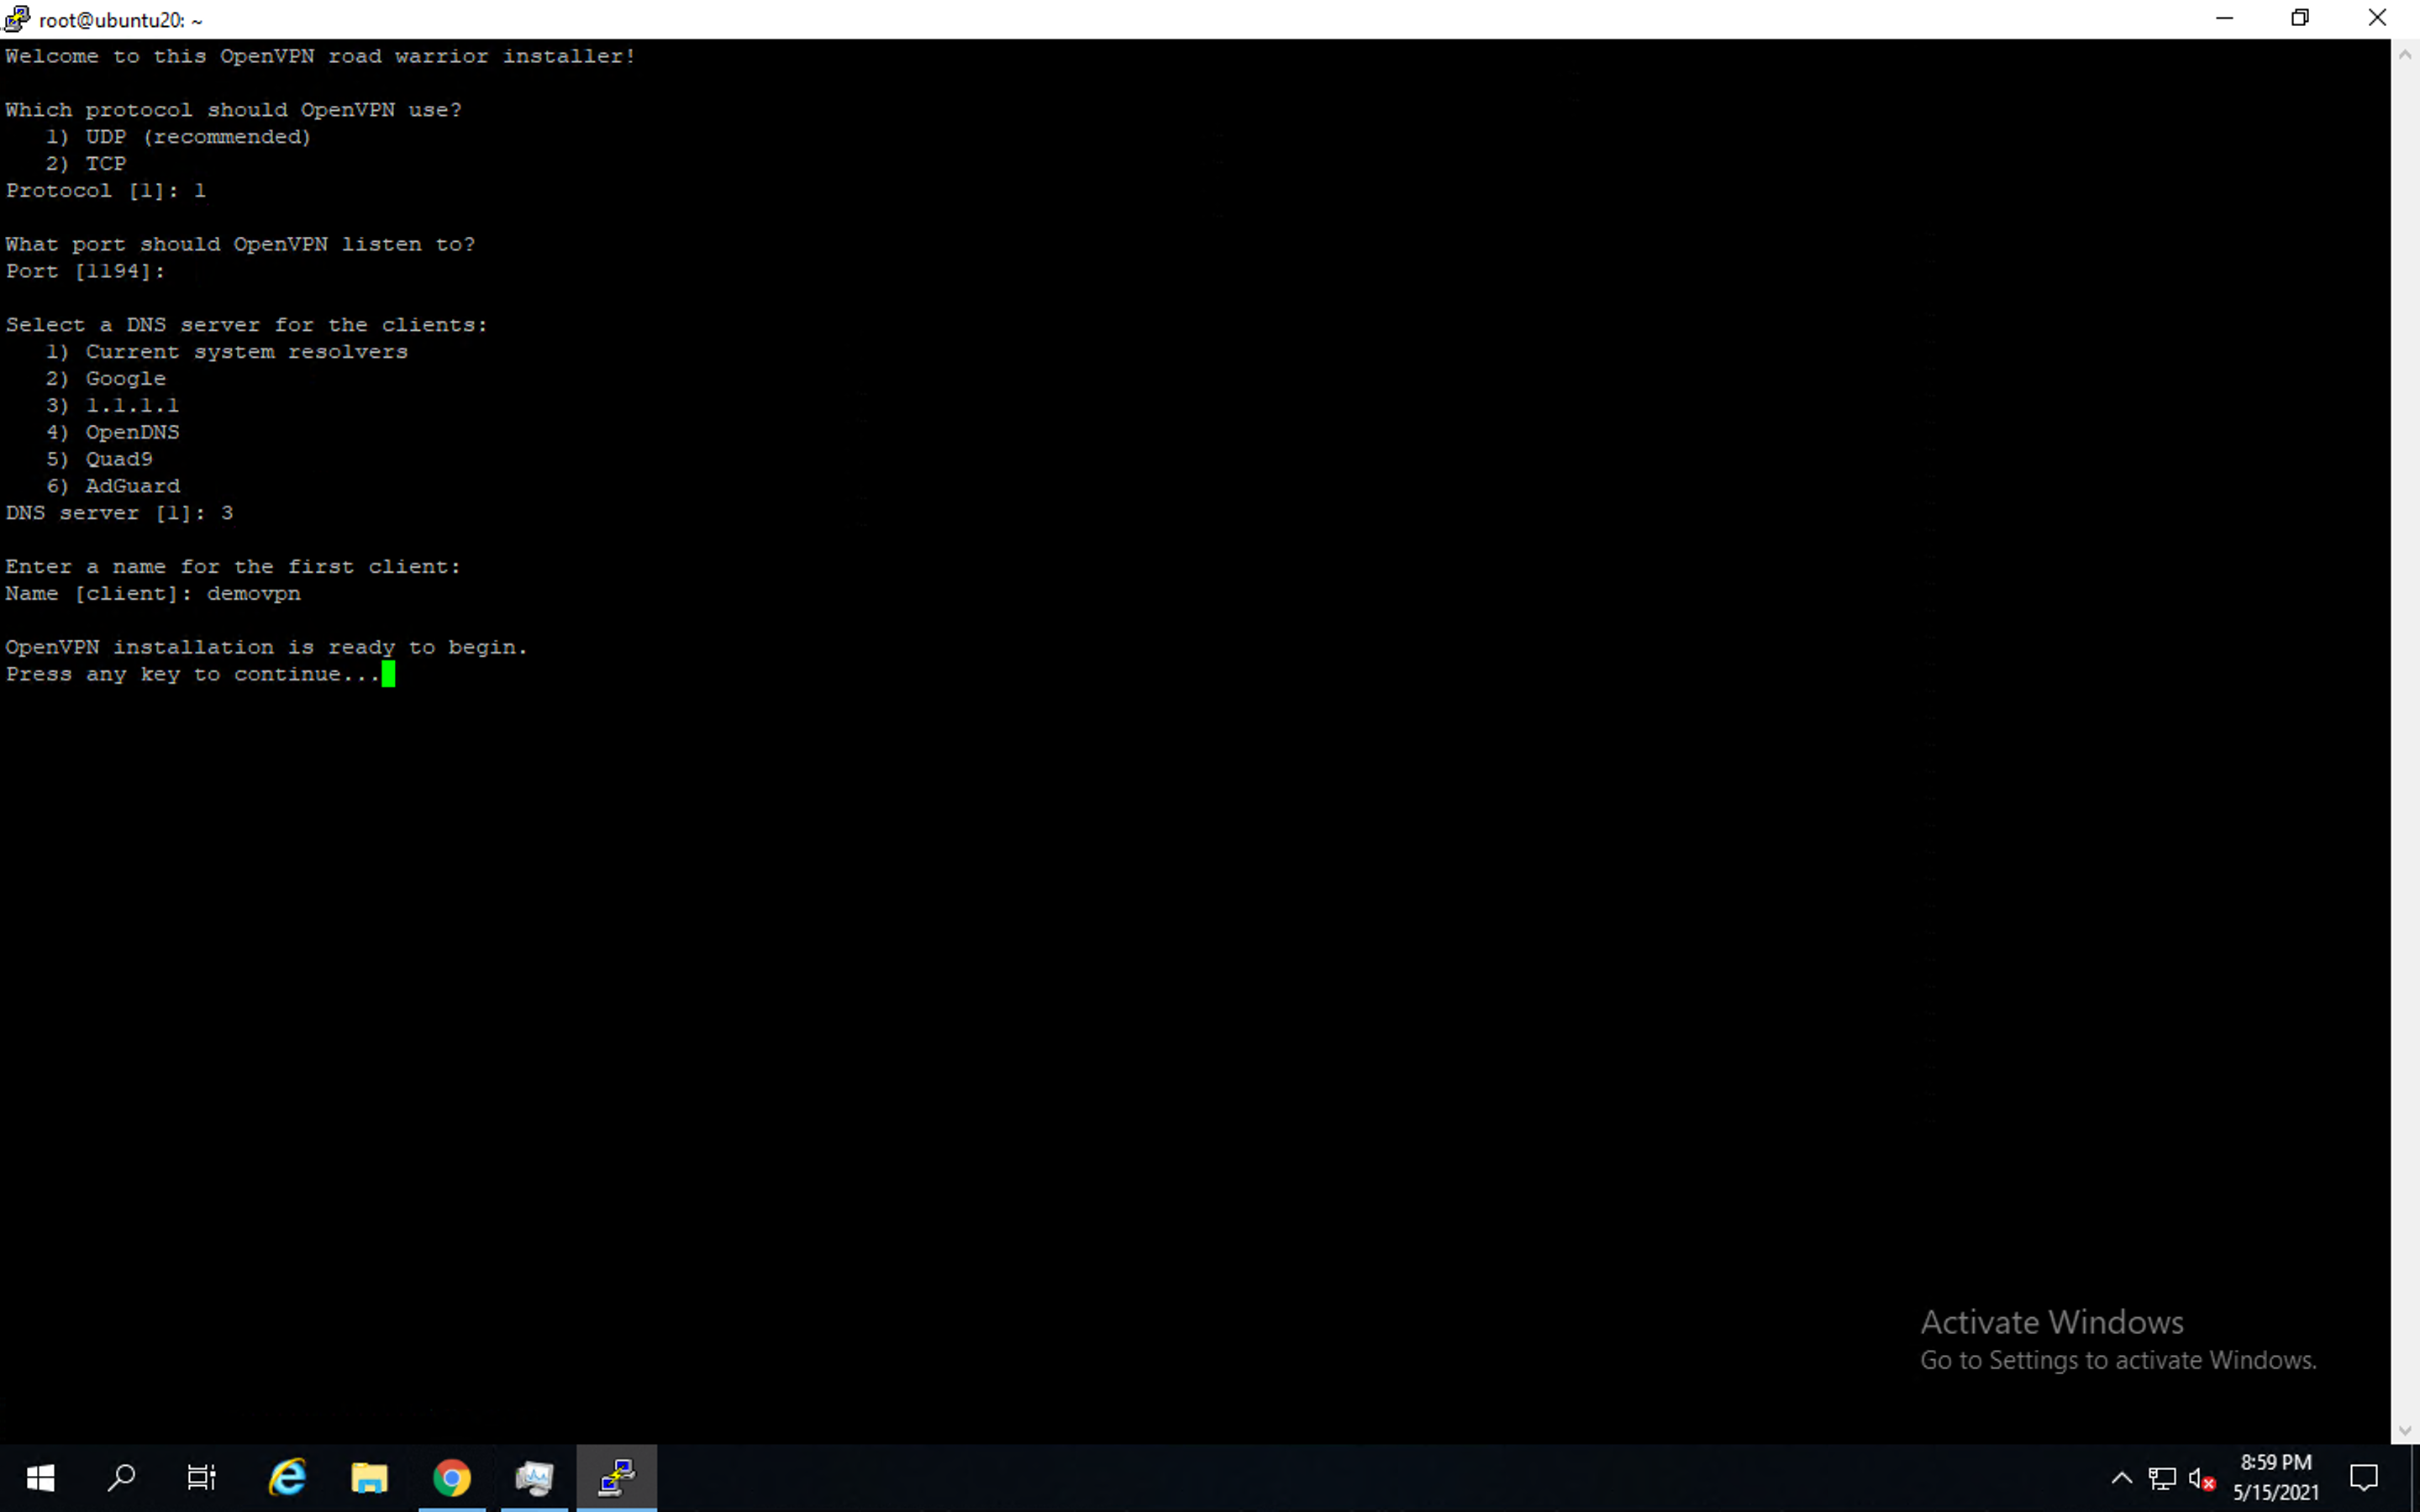
Once the openvpn-install.sh installation script is executed you will be asked for the following option to select from like the provided screenshot below. (For your information for the seak of this article we are creating a First client as the name: demovpn)
Once the installation process is done you can confirm by running the following command that the openvpn-server setup process has successfully completed and the openvpn-server is running on the server
$ sudo systemctl status openvpn-server@server.service
sudo: unable to resolve host ubuntu20: Name or service not known
● openvpn-server@server.service – OpenVPN service for server
Loaded: loaded (/lib/systemd/system/openvpn-server@.service; enabled; vendor preset: enabled)
Active: active (running) since Sun 2021-05-16 04:59:32 BST; 51min ago
Docs: man:openvpn(8)
https://community.openvpn.net/openvpn/wiki/Openvpn24ManPage
https://community.openvpn.net/openvpn/wiki/HOWTO
Main PID: 32046 (openvpn)
Status: “Initialization Sequence Completed”
Tasks: 1 (limit: 1111)
Memory: 1.2M
CGroup: /system.slice/system-openvpn\x2dserver.slice/openvpn-server@server.service
└─32046 /usr/sbin/openvpn –status /run/openvpn-server/status-server.log –status-version 2 –suppress-timestamps –config server.conf
May 16 05:09:40 ubuntu20 openvpn[32046]: demovpn/103.108.140.245:59144 MULTI_sva: pool returned IPv4=10.8.0.2, IPv6=(Not enabled)
May 16 05:09:40 ubuntu20 openvpn[32046]: demovpn/103.108.140.245:59144 MULTI: Learn: 10.8.0.2 -> demovpn/103.108.140.245:59144
May 16 05:09:40 ubuntu20 openvpn[32046]: demovpn/103.108.140.245:59144 MULTI: primary virtual IP for demovpn/103.108.140.245:59144: 10.8.0.2
May 16 05:09:41 ubuntu20 openvpn[32046]: demovpn/103.108.140.245:59144 PUSH: Received control message: ‘PUSH_REQUEST’
May 16 05:09:41 ubuntu20 openvpn[32046]: demovpn/103.108.140.245:59144 SENT CONTROL [demovpn]: ‘PUSH_REPLY,redirect-gateway def1 bypass-dhcp,dhcp-option DNS 1.1.1.1,dhcp-option>
May 16 05:09:41 ubuntu20 openvpn[32046]: demovpn/103.108.140.245:59144 Data Channel: using negotiated cipher ‘AES-256-GCM’
May 16 05:09:41 ubuntu20 openvpn[32046]: demovpn/103.108.140.245:59144 Outgoing Data Channel: Cipher ‘AES-256-GCM’ initialized with 256 bit key
May 16 05:09:41 ubuntu20 openvpn[32046]: demovpn/103.108.140.245:59144 Incoming Data Channel: Cipher ‘AES-256-GCM’ initialized with 256 bit key
May 16 05:25:06 ubuntu20 openvpn[32046]: demovpn/103.108.140.245:59144 [demovpn] Inactivity timeout (–ping-restart), restarting
May 16 05:25:06 ubuntu20 openvpn[32046]: demovpn/103.108.140.245:59144 SIGUSR1[soft,ping-restart] received, client-instance restarting
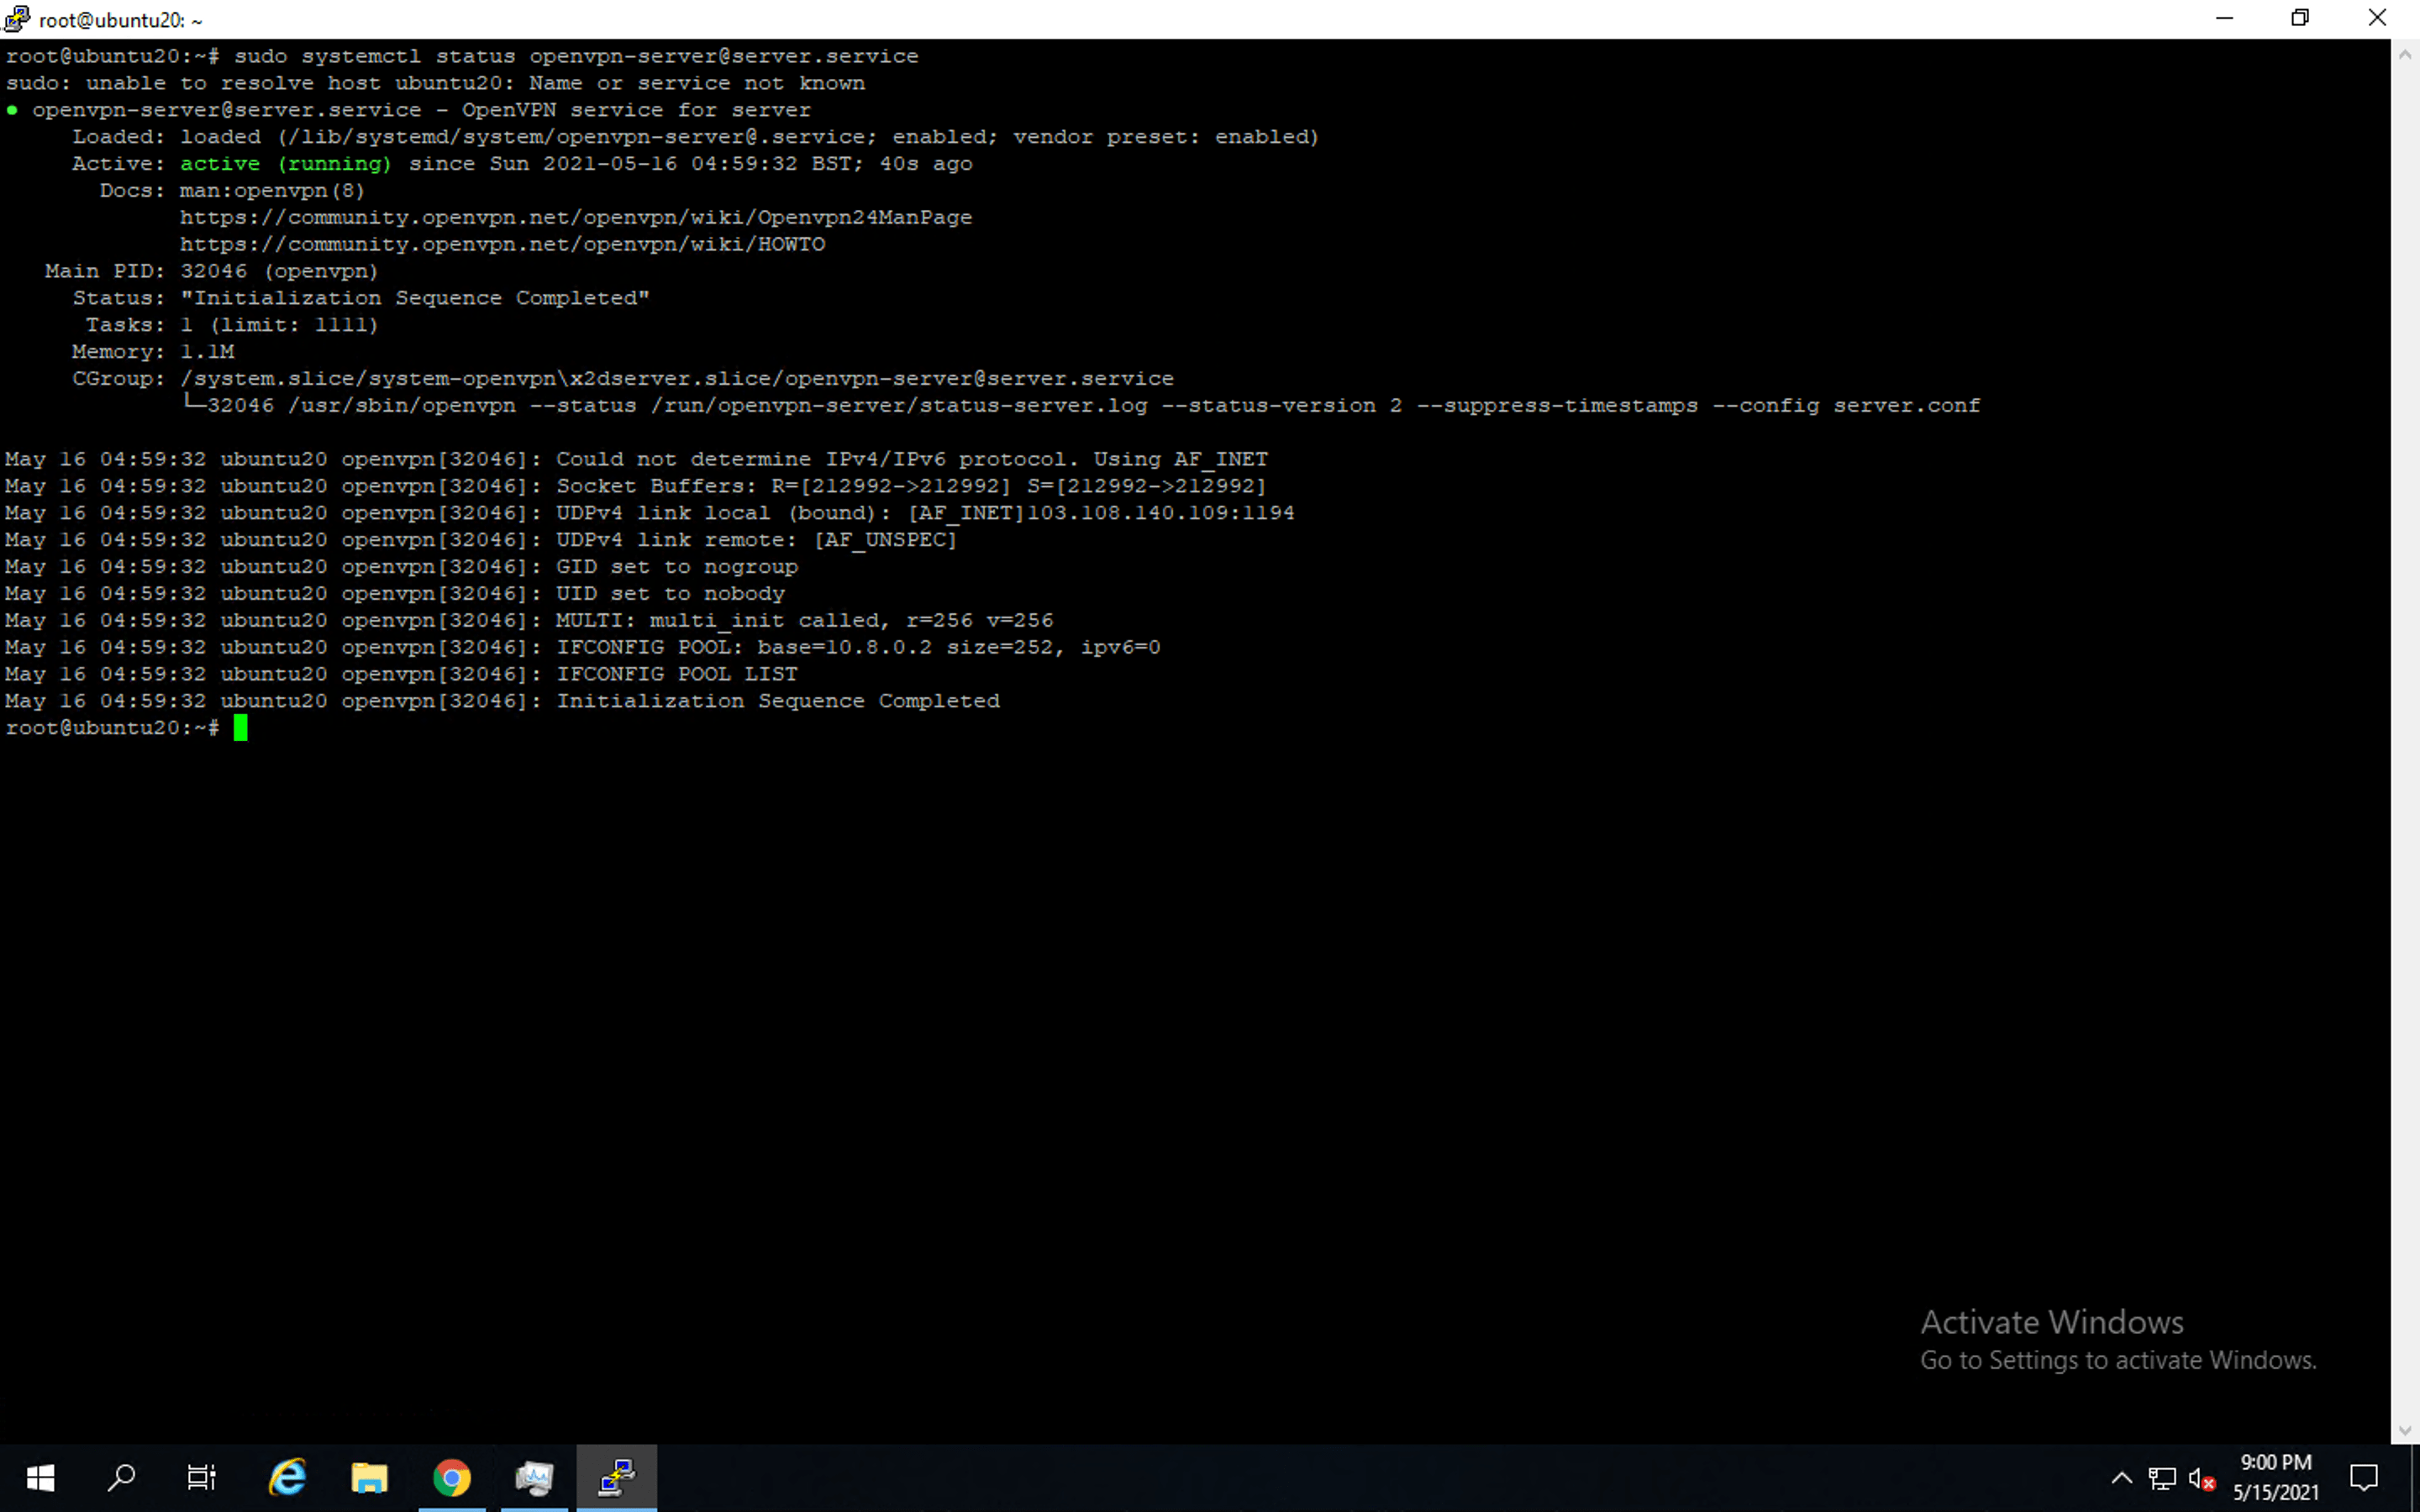
If anyhow the openvpn-server is not running on the server you can try to start the openvpn-server by running the following command
$ sudo systemctl start openvpn-server@server.service
However, the following is the summary of the commands which you may need from time to time to administer the openvpn-server service
$ sudo systemctl stop openvpn-server@server.service # <— to stop openvpn-server
$ sudo systemctl start openvpn-server@server.service # <— to start openvpn-server
$ sudo systemctl restart openvpn-server@server.service # <— to restart openvpn-server
$ sudo systemctl status openvpn-server@server.service # <— to get openvpn-server status
Finally, by following the above steps OpenVPN server installation process is completed and now below we will show you how you can connect to your OpenVPN server from Windows PC.
How to configure OpenVPN client on Windows PC
Step 1 – Download OpenVPN
To download the OpenVPN client go to https://openvpn.net/community-downloads/

Once the installer is downloaded run the installer to install the OpenVPN client on your PC
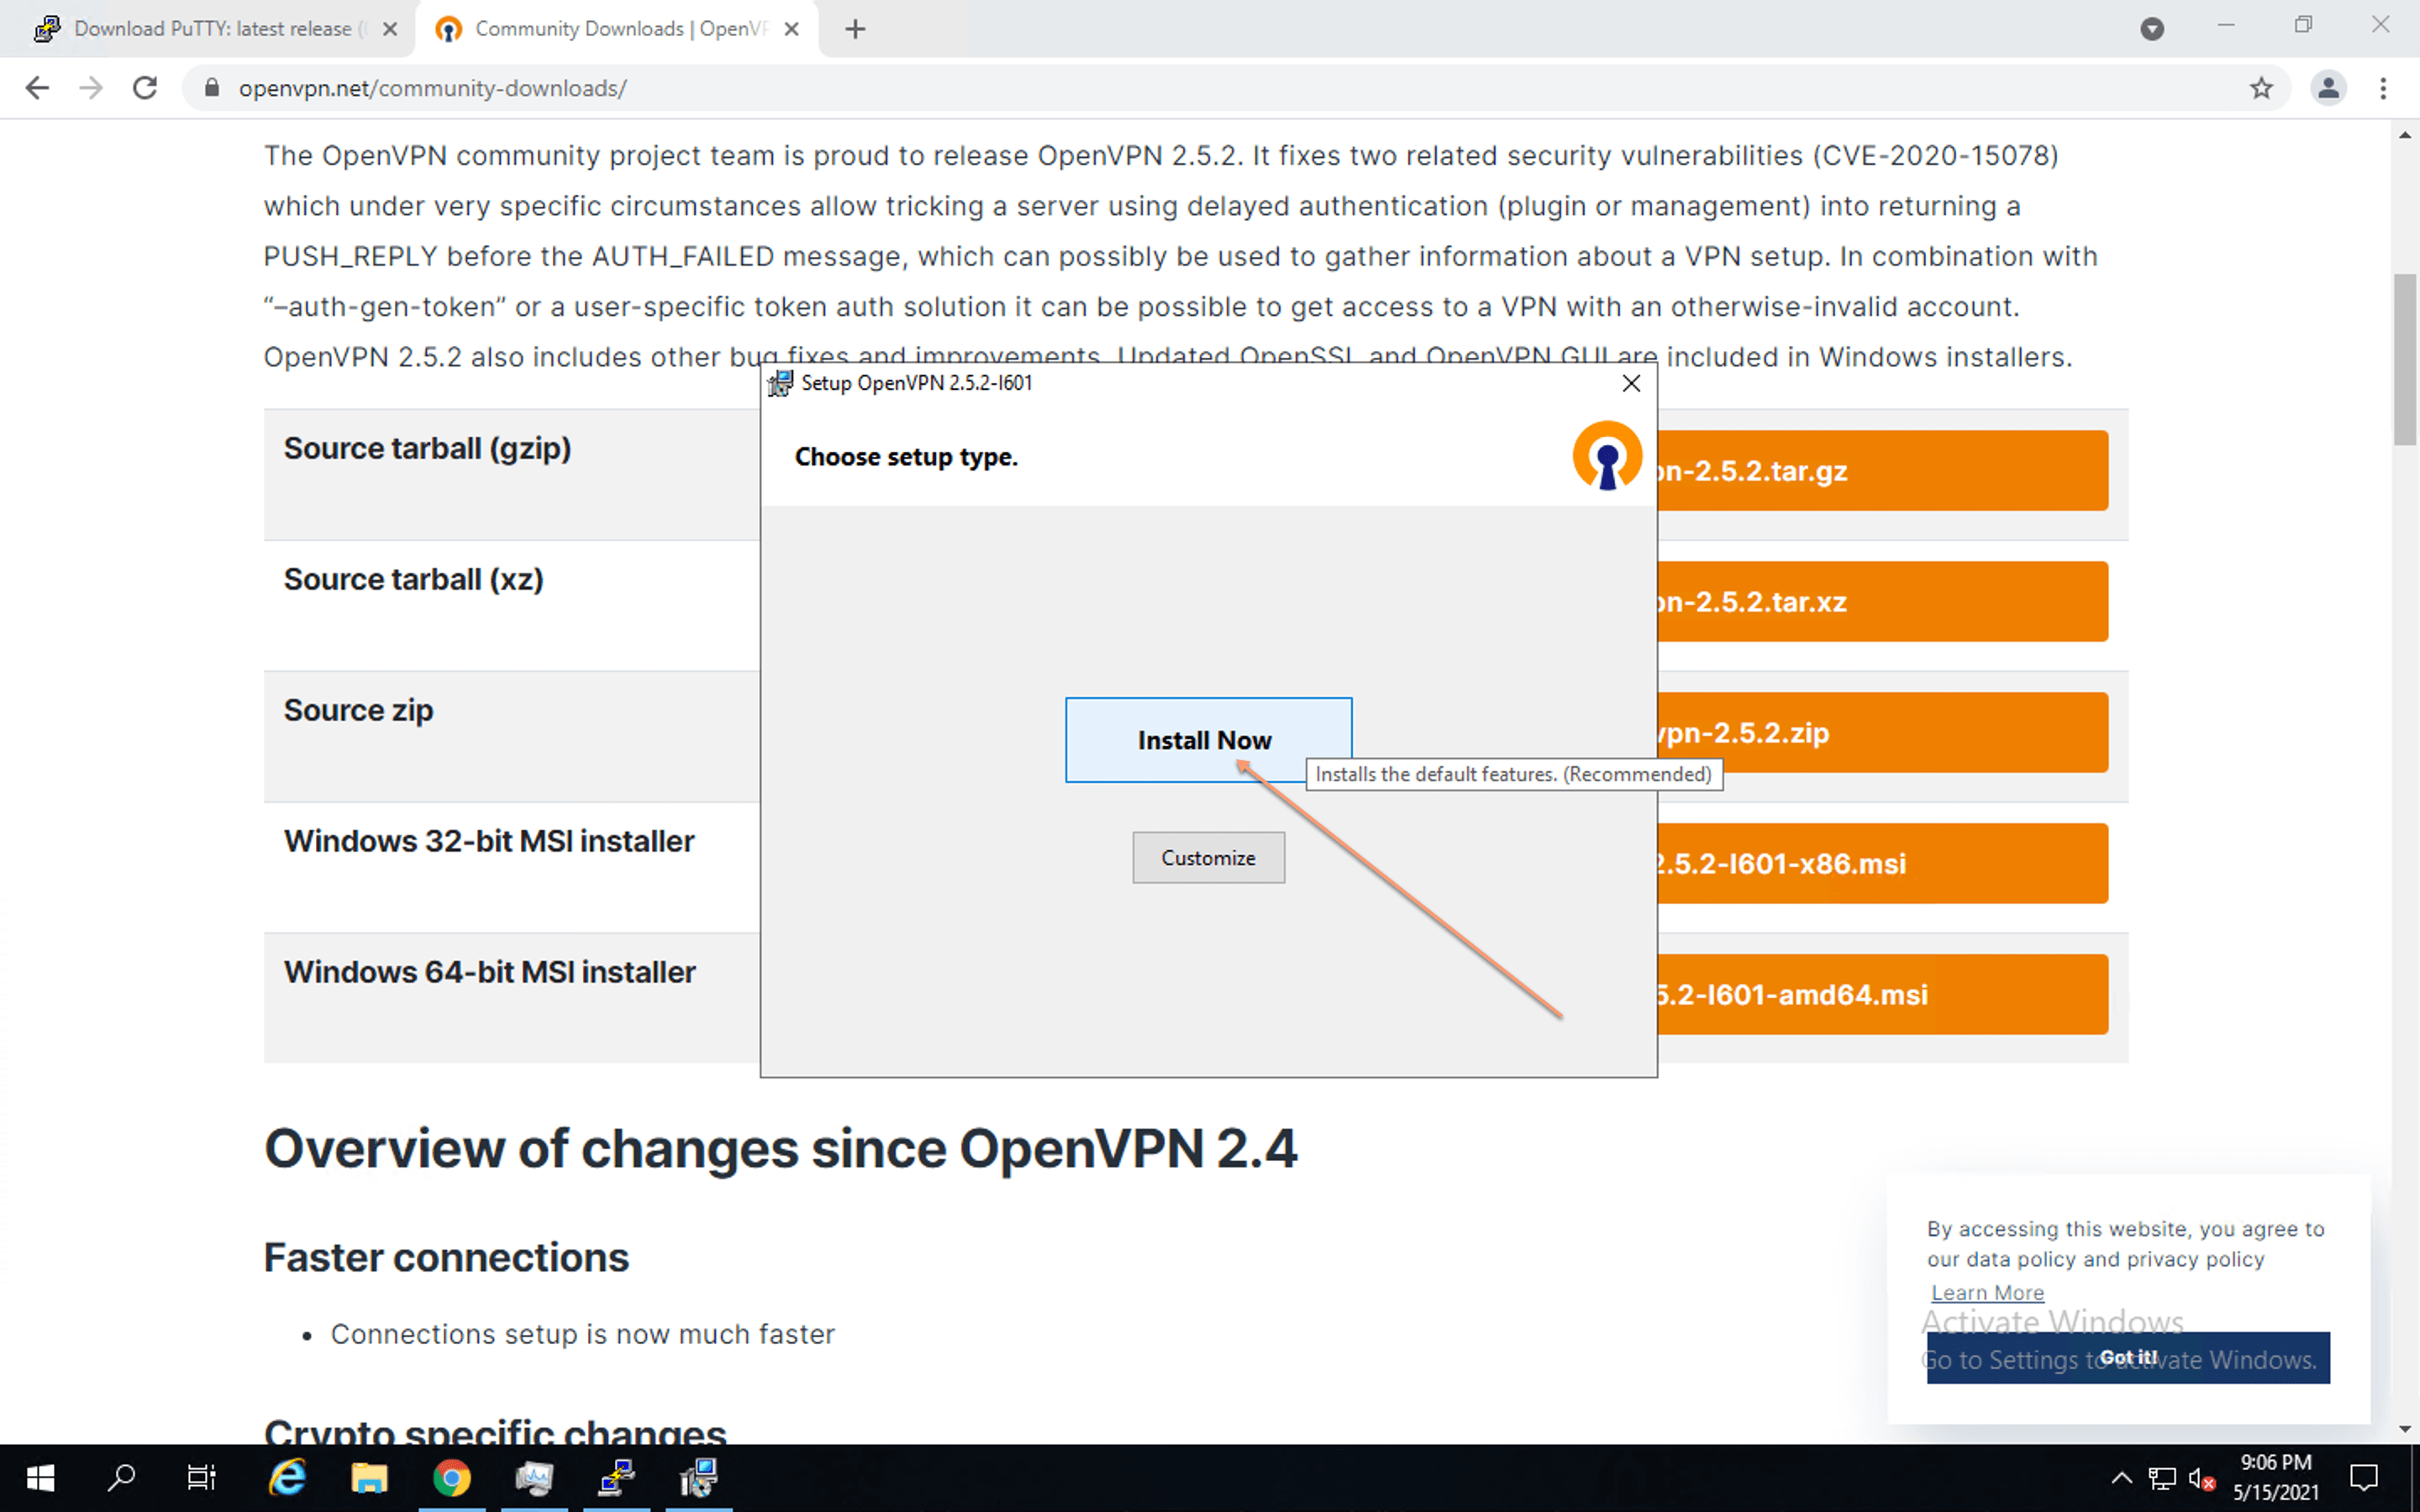
Step 2 – Connect to the VPN server using the OpenVPN client
Once the OpenVPN installation process is completed. Login to the server and copy the content of the file demovpn.ovpn or download the file demovpn.ovpn and save it to your PC.
Finally, double click on the demovpn.ovpn and your PC should connect to your OpenVPN server.
How to configure OpenVPN client on Android Mobile
Step 1 – Download OpenVPN Connect – Fast & Safe SSL VPN Client
Search for the OpenVPN Connect – Fast & Safe SSL VPN Client from the Android Play Store at https://play.google.com/store/apps/details?id=net.openvpn.openvpn&hl=en&gl=US and install the app.

Open the installed app.
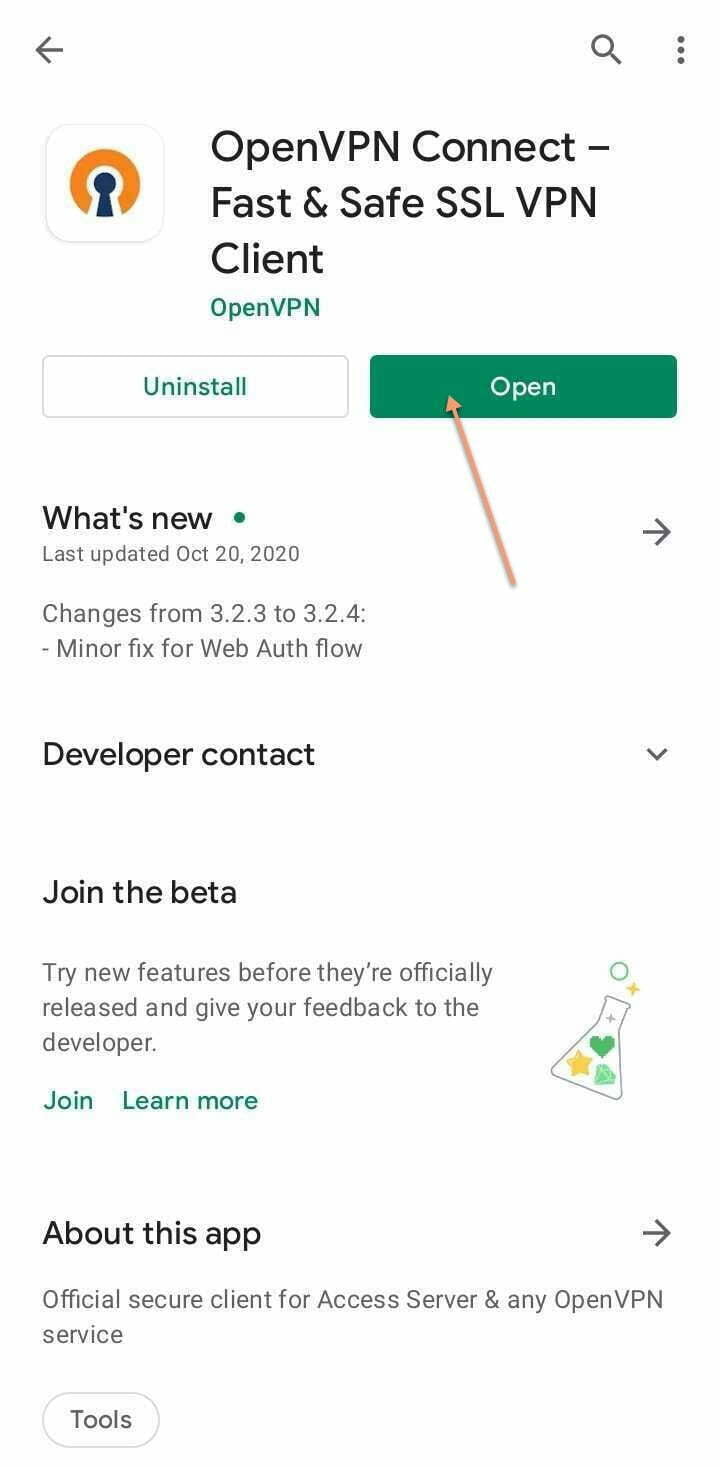
Accept the Terms & conditions of the app
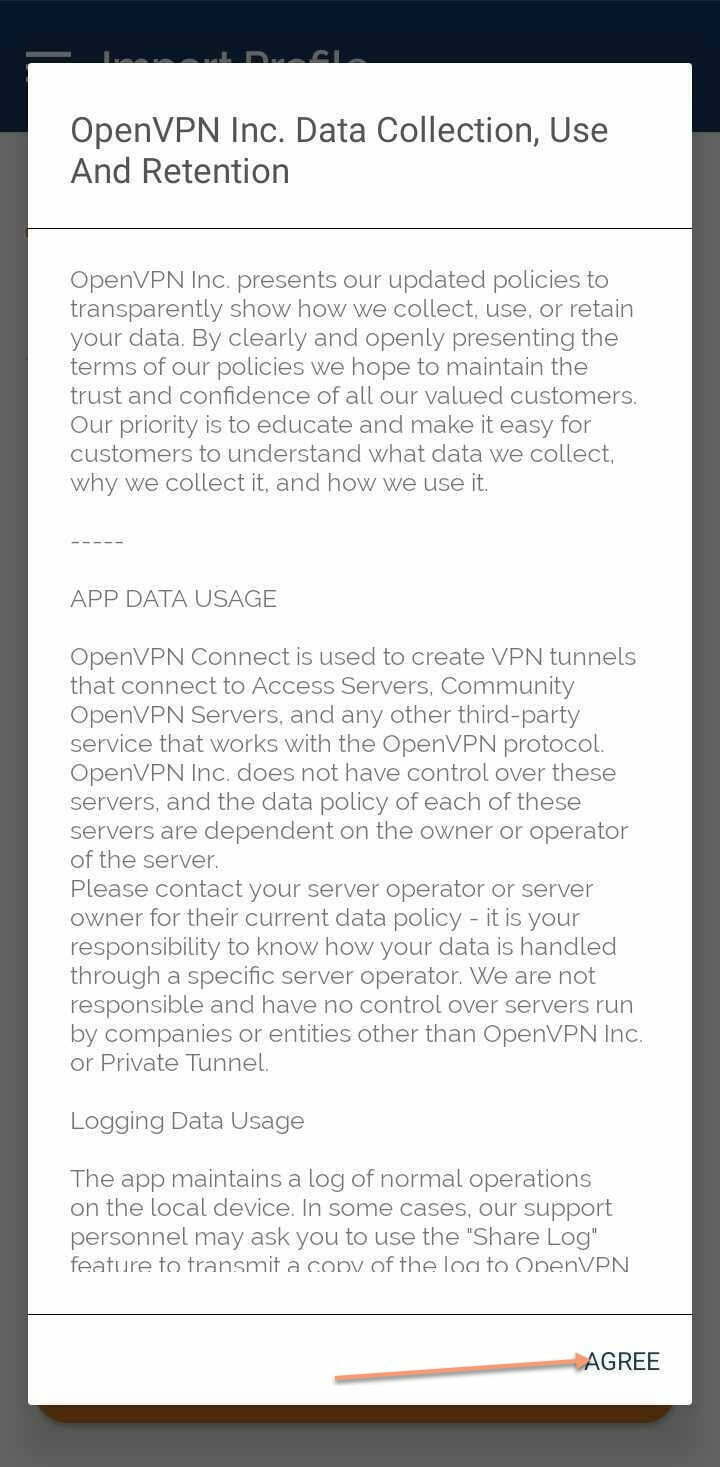
Step 2 – Connect to the OpenVPN server
Import the demovpn.ovpn file to the application
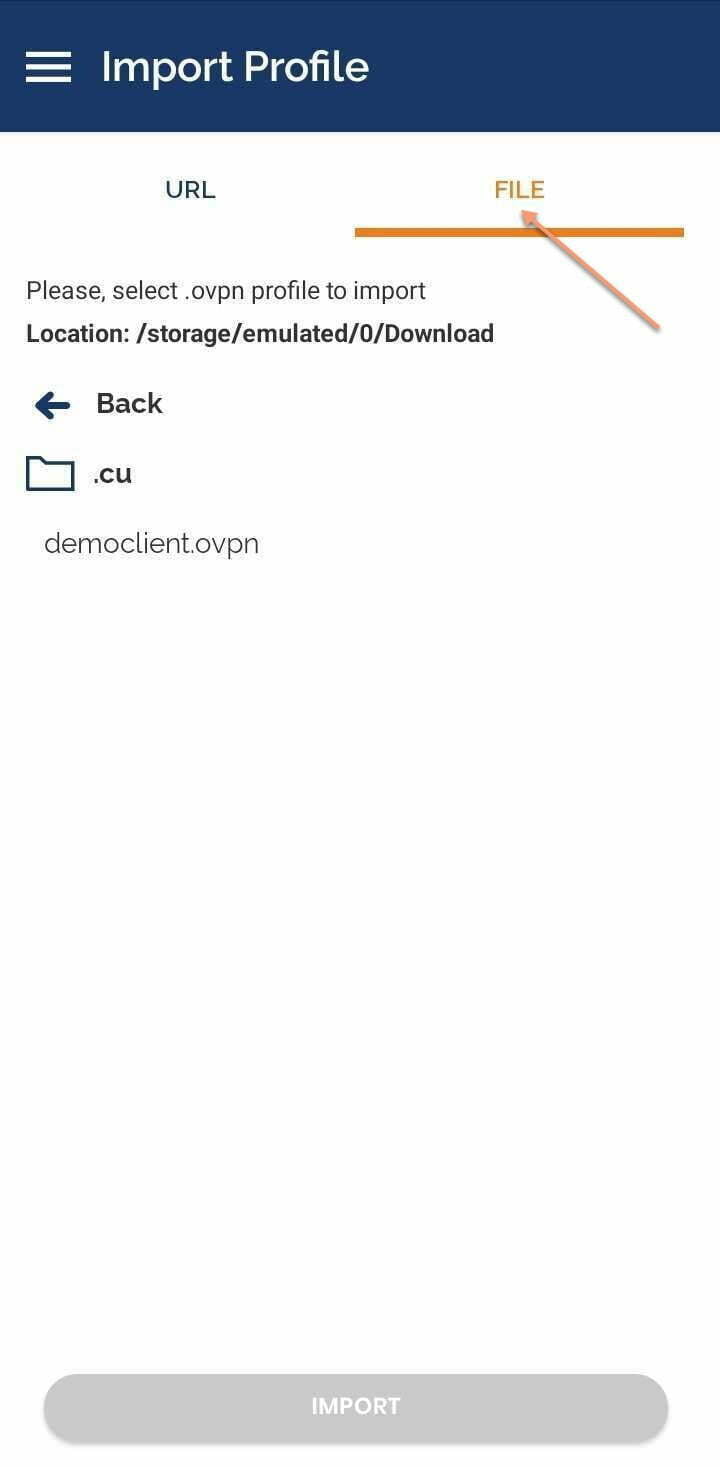

 Once the import process is completed try to connect to the imported OpenVPN profile like the below screenshot.

Once you will successfully be connected to the VPN server you will be presented with the below screen
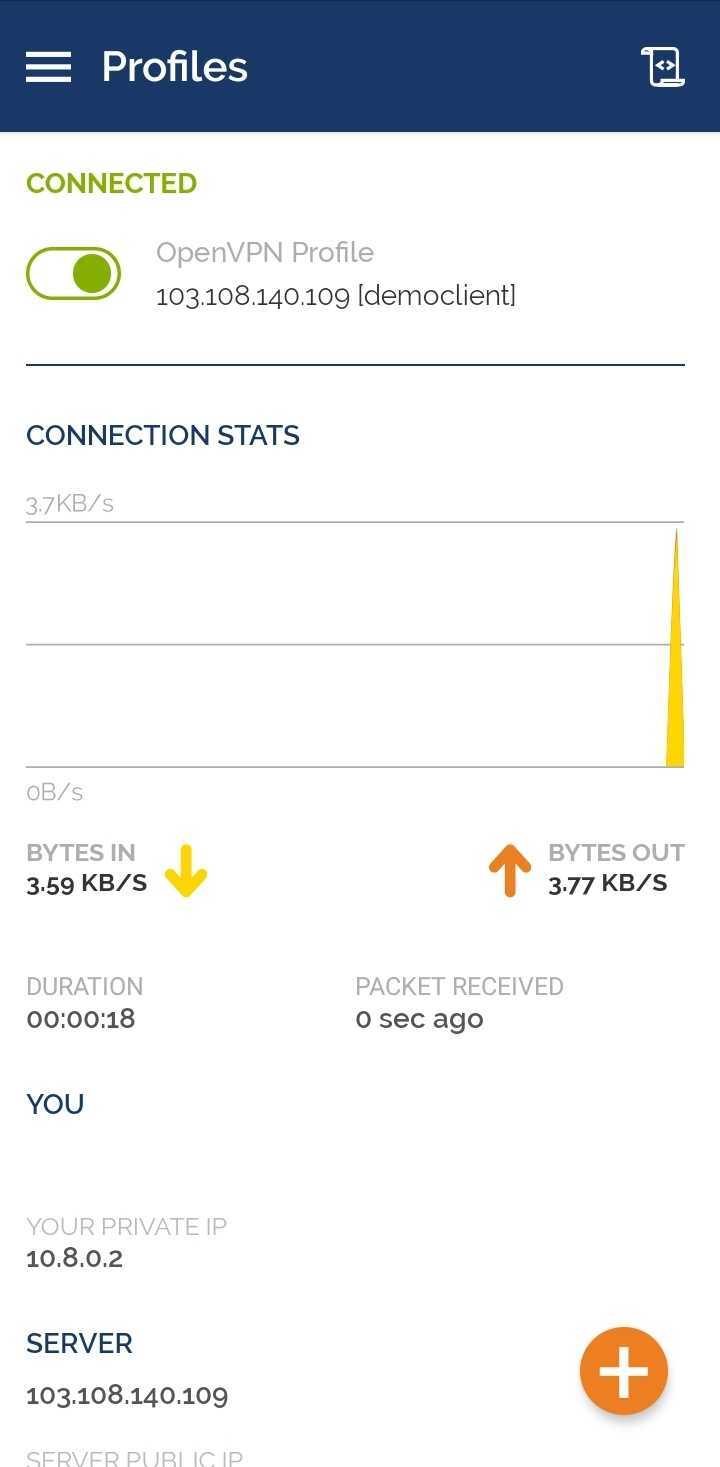
Now as shown above your mobile device’s external IP is now changed to your VPN server’s IP.
How to configure the OpenVPN client on Mac
Download the Tunnelblick software from https://tunnelblick.net/ and configure the software with the downloaded demovpn.ovpn OpenVPN profile and connect to the VPN server.
If you are looking for a BDIX VPN server then you can simply install the VPN server on the VPS or dedicated server of XeonBD that is hosted in the XeonBD’s Bangladesh data center following the above-mentioned methods.
For more details and other opportunities about BDIX Hosting, BDIX Reseller, BDIX VPS, BDIX Dedicated Server or BDIX Email Server related services from our Bangladesh data center feel free to inbox us or call us at +8801977-936623 or write to us at sales@xeonbd.com


