This article will assist you in making the changes detailed in step one of the following article series for domains registered at GoDaddy:
It is recommended that you are familiar with the entire process outlined in that article series before proceding with the steps below.
You will need to have access to the welcome email XeonBD sent you when you opened your hosting account as it contains the IP addresses and recommended subdomains to use.
If you do not have the welcome email from XeonBD, please contact us and we can re-send the email or provide you with the IP addresses you need to use.
- Log into your GoDaddy Account Manager.
- Locate the domain you wish to modify, then select DNS:

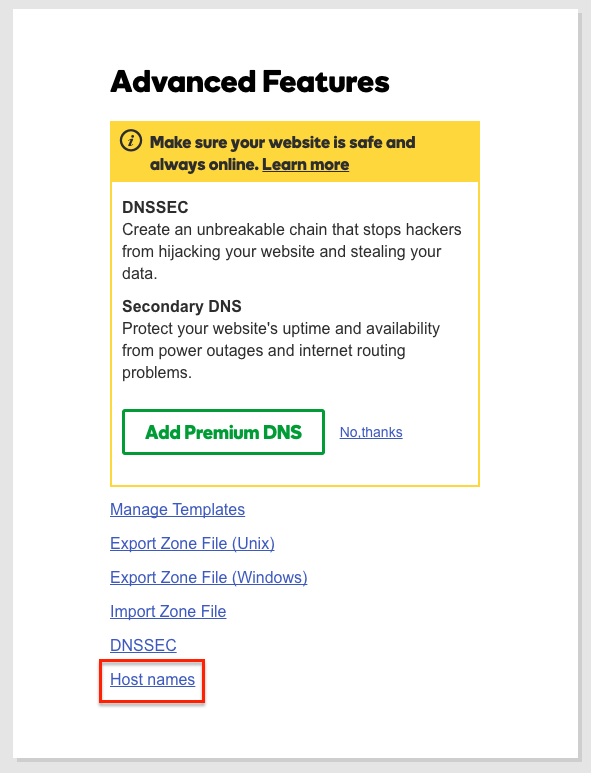
3. On the DNS page, scroll to Advanced Features and, click on Host names.

4. On the next page, click the green Add button.

5. For Hostname, input ns1.
6.For IP Address, enter the first private name server IP address provided in the welcome email.
7.Click Save.

8. Repeat steps 5-8 for the second private name server.
Note: It may take up to 48 hours for GoDaddy to register your updates; however, for .com and .net domains, the time is typically 4 to 8 hours.
Once successfully registered, you can set all of your domain names to use the private name servers you registered.
Keep in mind, like most name server changes, it will take an additional 24 to 48 hours (sometimes quicker) for this change to propagate and become usable. This delay applies to all domains with any registrar, not just GoDaddy. If you would like to learn more about domain propagation time please read our article about domain propagation by clicking here.


